Easy MIDI Help
Overview
Easy MIDI turns your Mac keyboard, trackpad and mouse into a powerful MIDI controller. It sends MIDI notes and control messages to any soft synth or DAW such as GarageBand, Logic Pro, Ableton Live, Cubase, Digital Performer, Reason and Pro Tools.
This is very useful when you want to jot down some musical ideas quickly and easily whilst travelling, sitting in a coffee shop or even on your couch at home. Experiment with melodies, chord progressions and drum patterns wherever you are with ease.
You can even control CoreMIDI iOS apps or hardware synth via MIDI interface.
For the full list of features visit Easy MIDI product page.
Getting Started
You don’t need to do much to get going, simply launch Easy MIDI and your favourite DAW or Synth and start pressing keys on your Mac keyboard. By default most programs monitor MIDI messages coming from all MIDI drivers on all channels. Every time you press a key you will hear virtual instruments playing the corresponding note instantly.
By default Easy MIDI sends MIDI messages to a virtual MIDI driver called Easy MIDI. But you can send MIDI messages to any MIDI driver that’s available on your Mac. Simply set the MIDI Out field to another driver.
Playing Notes
Easy MIDI gives you instant visual feedback as to what keys you are pressing and what MIDI notes are being played. This lets you concentrate on playing music without ever needing to look down on your computer keyboard.
You can quickly go up or down an octave by using ↑ and ↓ keys for the top keyboard octaves, ⇧↑ and ⇧↓ for the bottom keyboard octave. Use ← and → or ⇧← and ⇧→ to change the keyboards’ starting note.
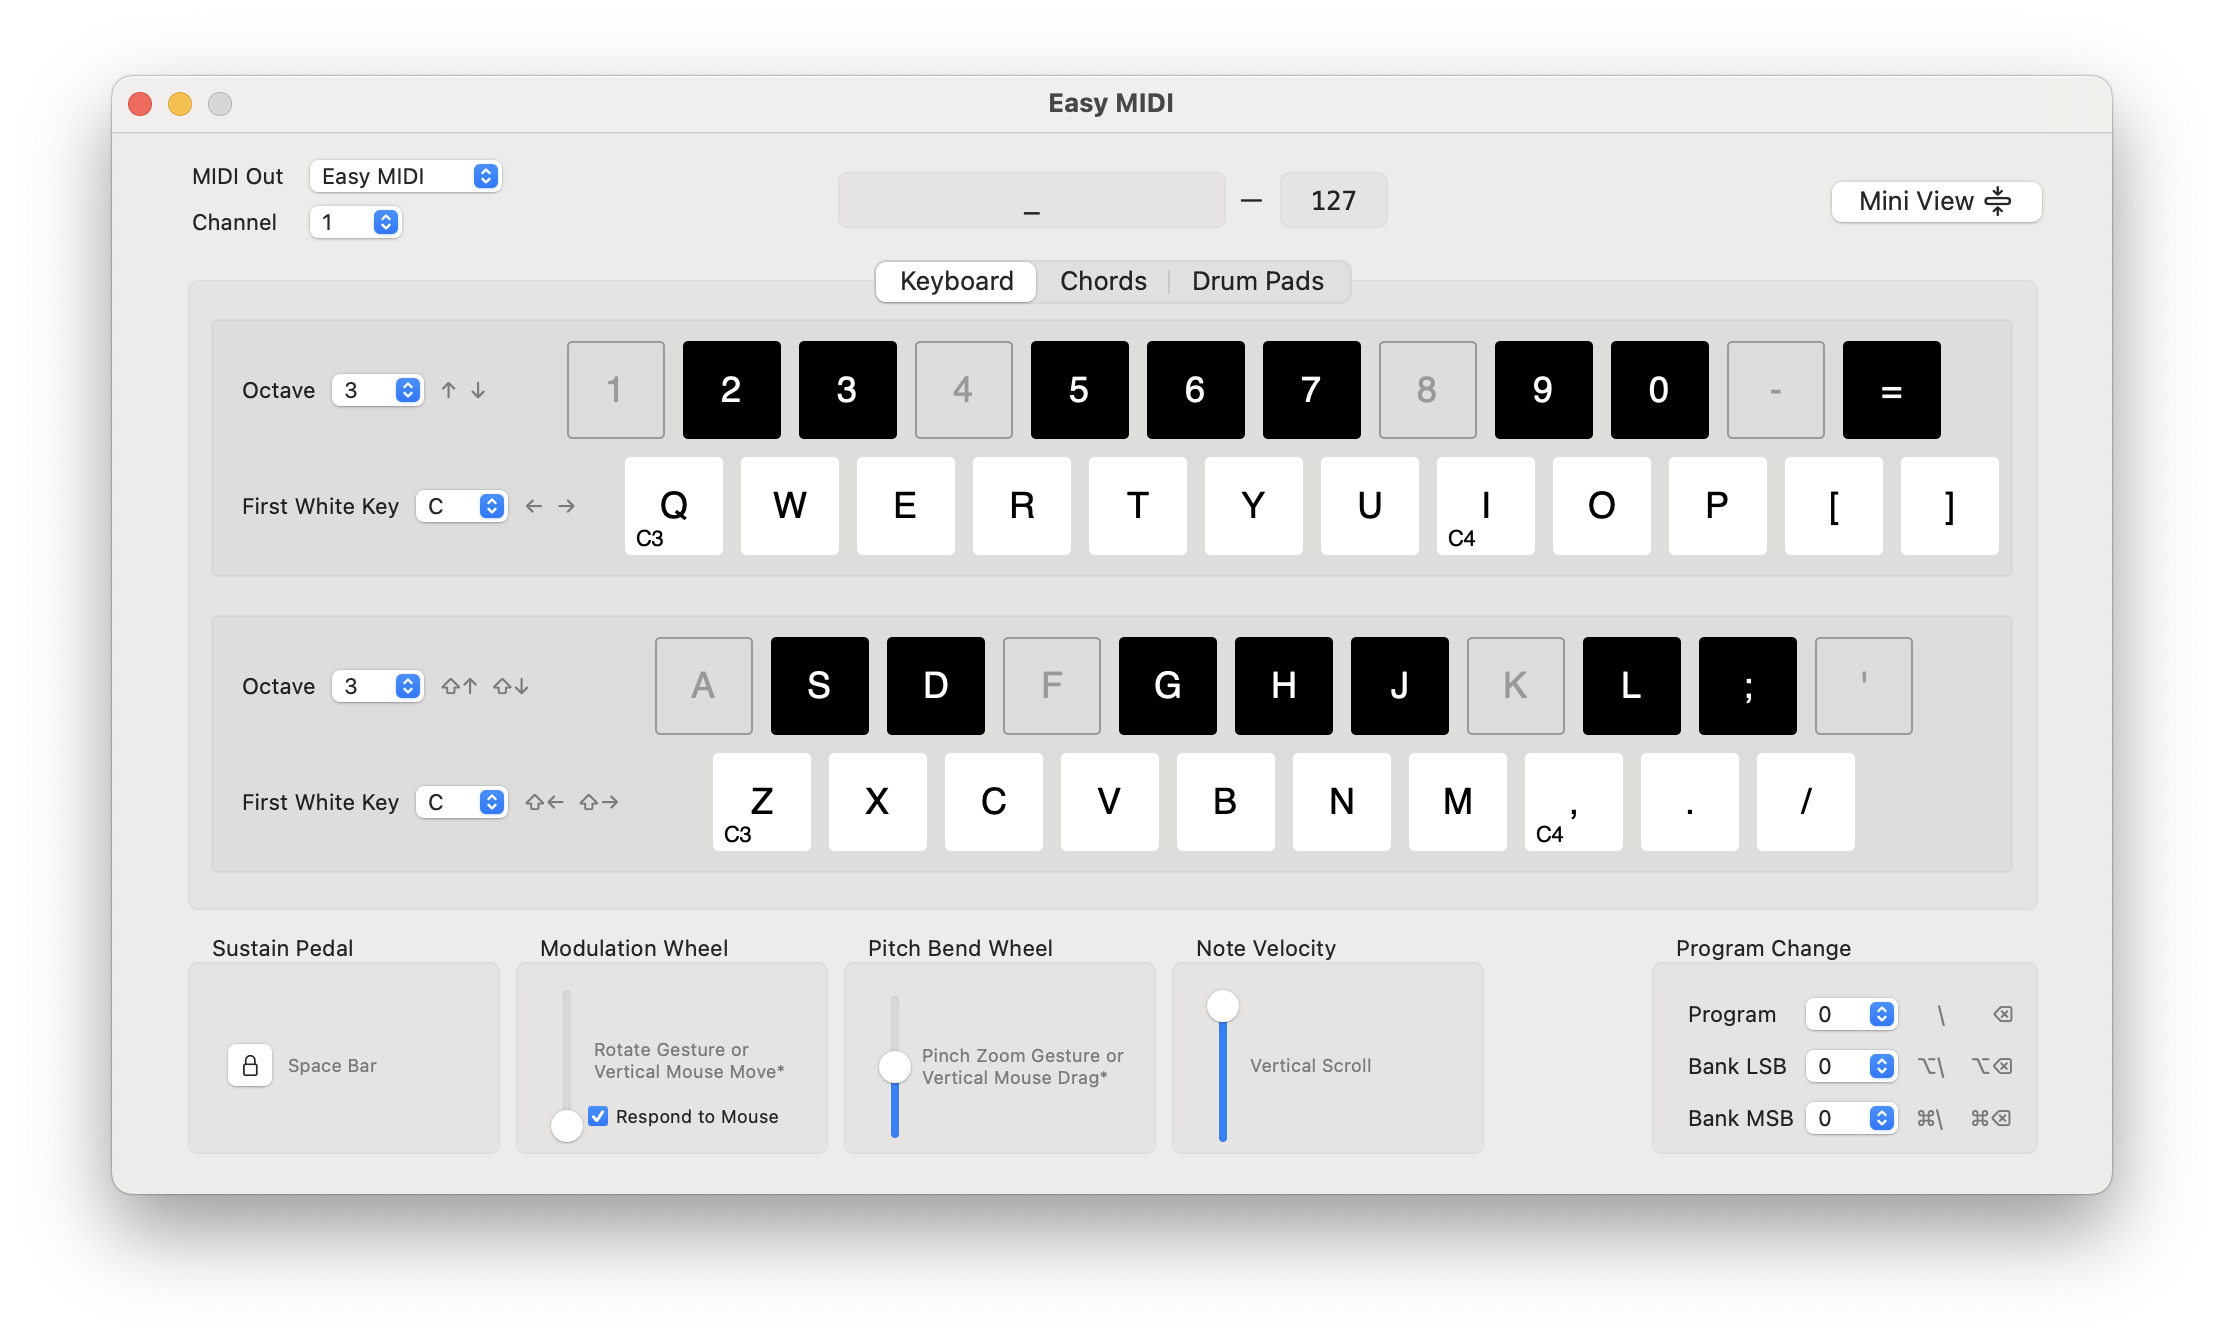
Note Velocity
Use vertical mouse scroll to adjust note velocity. You can adjust velocity even when you are not playing notes.
Sustain
You can toggle sustain on/off by pressing a spacebar on your Mac keyboard.
Pitch Bend
There are two ways to change pitch bend. You can use a trackpad’s pinch-zoom gesture. If you don’t have a trackpad you can perform a vertical mouse drag. Note that drag gesture only works while notes are held down.
Modulation Wheel
There are two ways to perform modulation. You can use a trackpad’s rotate gesture. If you don’t have a trackpad you can perform a vertical mouse move. Note that vertical mouse move only works while notes are held down.
Chords & Custom Scales
As of v1.3 Easy MIDI supports triggering chords and custom scales. The app comes with a few presets to get you started. Simply select one of the chord set presets to play around with chord progressions and custom scales. You can trigger the MIDI chords using the numeric keys on your Mac keyboard. You can duplicate and modify a built-in chord set or create one from scratch. You can transpose entire chord set up or down by a few octaves by pressing ↑ and ↓ keys respectively.
Editing Chords
Select a chord pad to start editing it. Easy MIDI takes additive approach when it comes to creating chords. What this means is that you simply select a chord root and you define the rest of the chord notes by selecting intervals from the root note. If a chord is recognised as one of the standard chords a chord pad will display its chord symbol, otherwise it will display the set of notes. Each chord note can be transposed up or down by an octave to create chord inversions.
Creating Custom Scales
Creating custom scales is just as easy as creating the chords. All you have to do is select a chord root for each chord pad and keep the chord intervals unset.

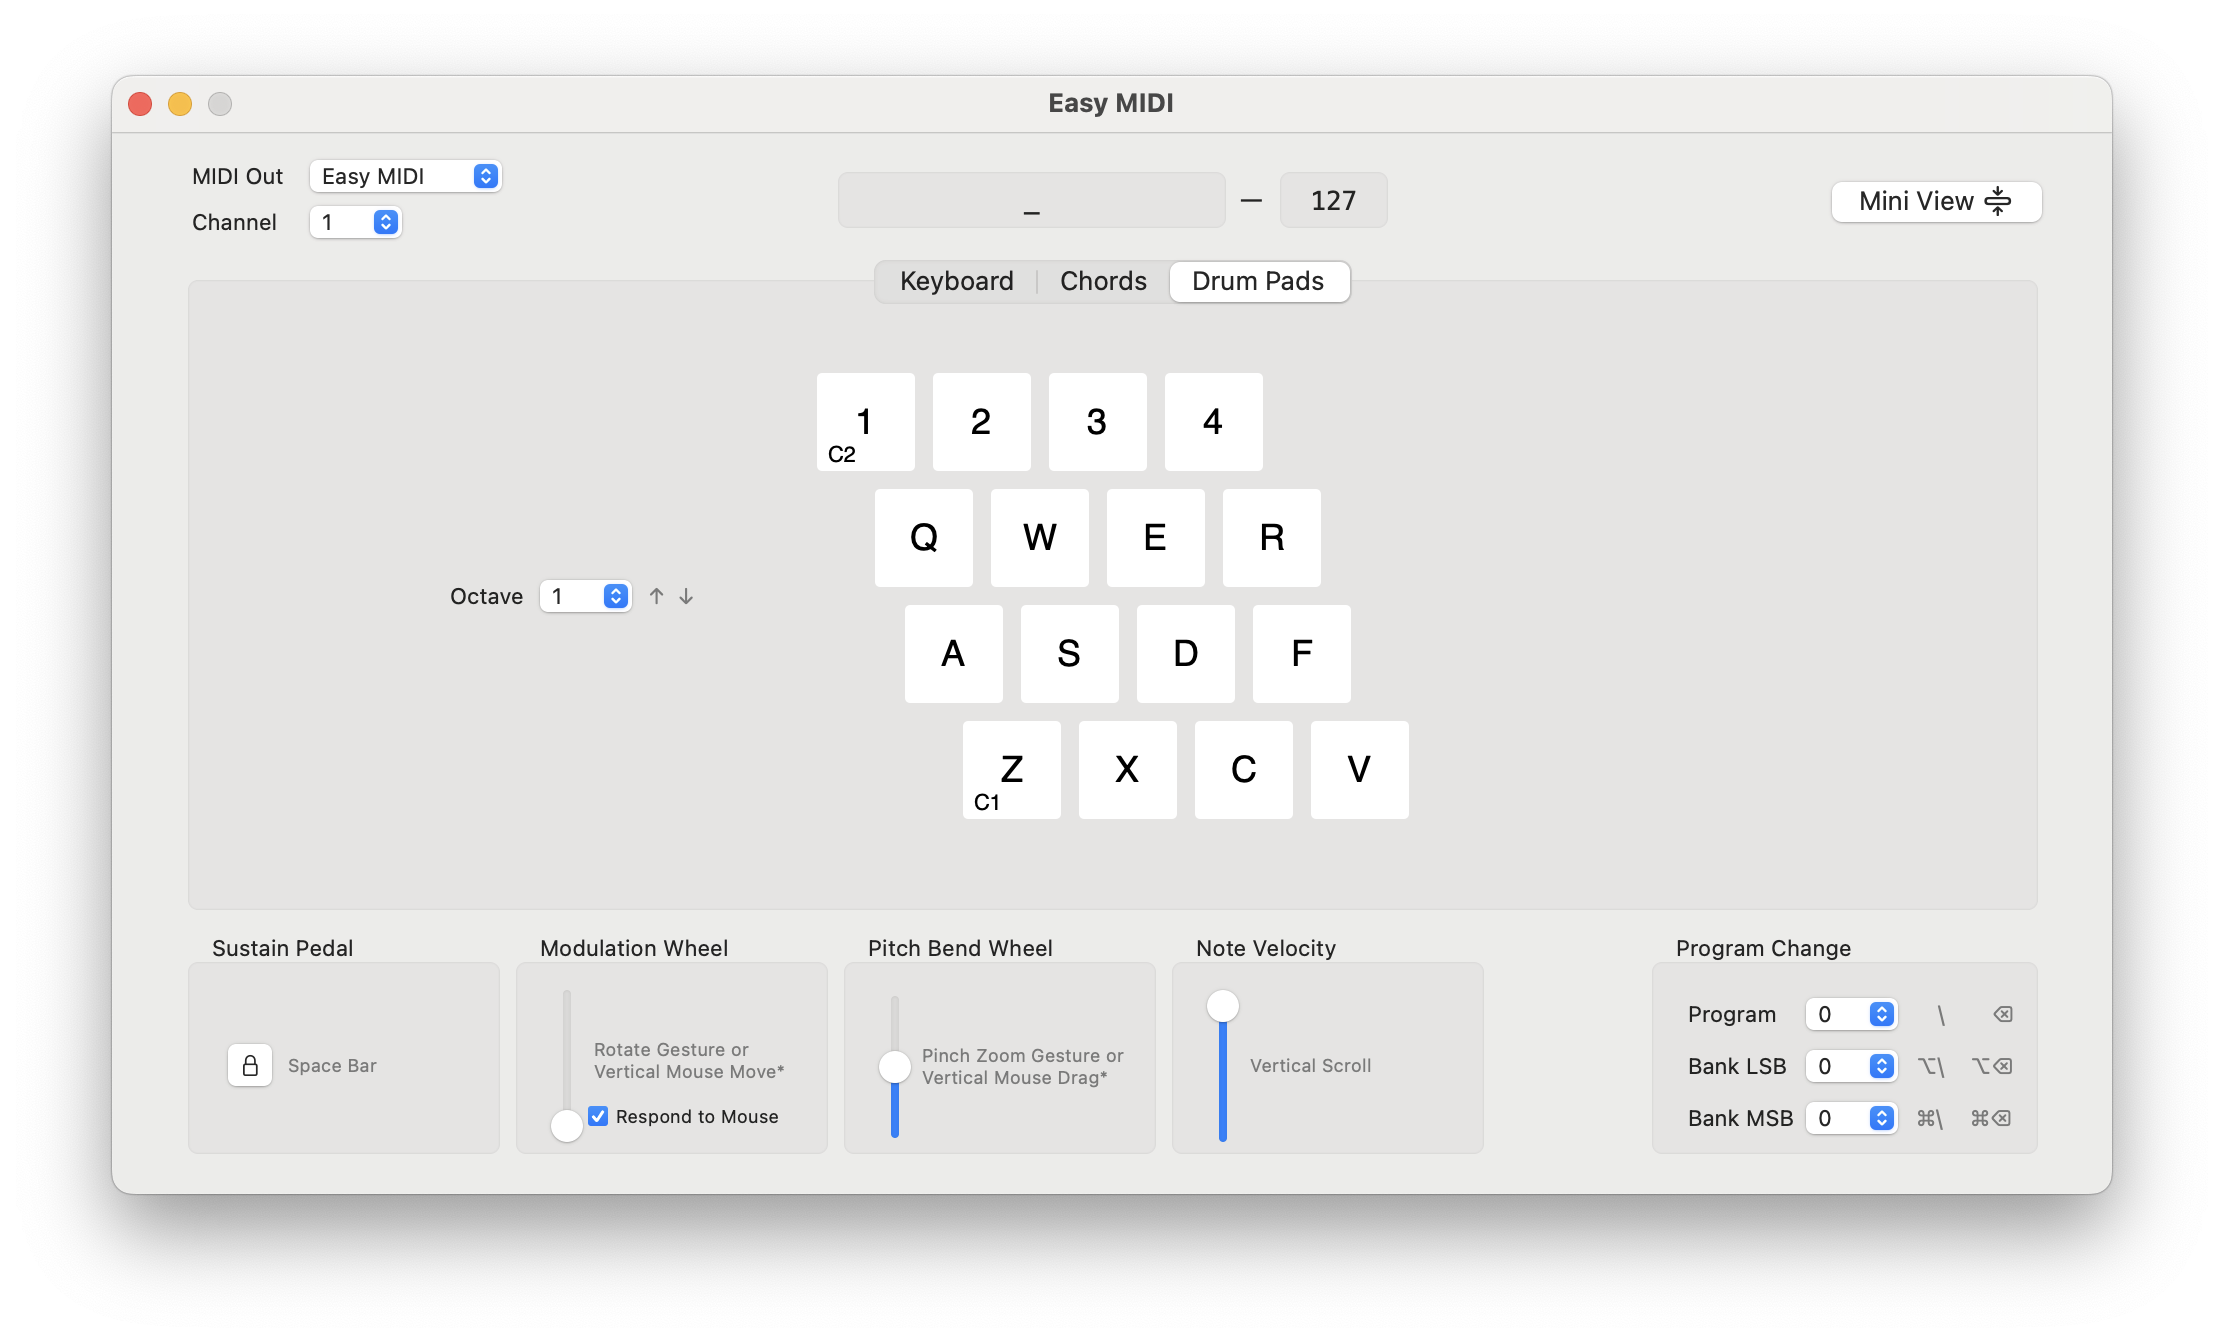
Drum Pads
Easy MIDI also provides MPC style drum pad key layout. Use ↑ and ↓ keys to quickly change the octave.
Controlling Hardware Synth
To control any external MIDI controllable hardware simply set MIDI Out to your MIDI interface that’s connected to the hardware.
iOS synths can be controlled by setting MIDI Out to the corresponding Network Session.
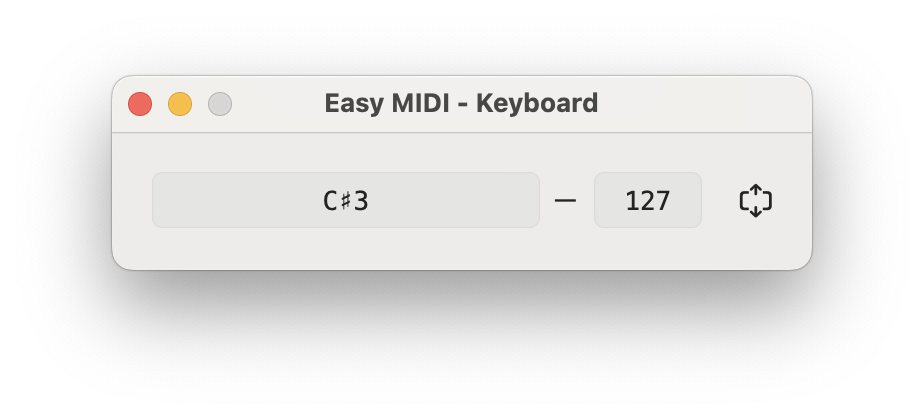
Mini View
You can switch to Mini View easily by pressing the Mini View button or use ⌘⌥M keyboard shortcut. This can be useful when you are recording MIDI notes into your DAW and you want to watch the piano roll as the MIDI clip is being recorded. The window title indicates the active tab. You can switch between Keyboard, Chords and Drum Pads tabs using the keyboard shortcuts ⌘1, ⌘2 and ⌘3 respectively.
Hide/Show Easy MIDI
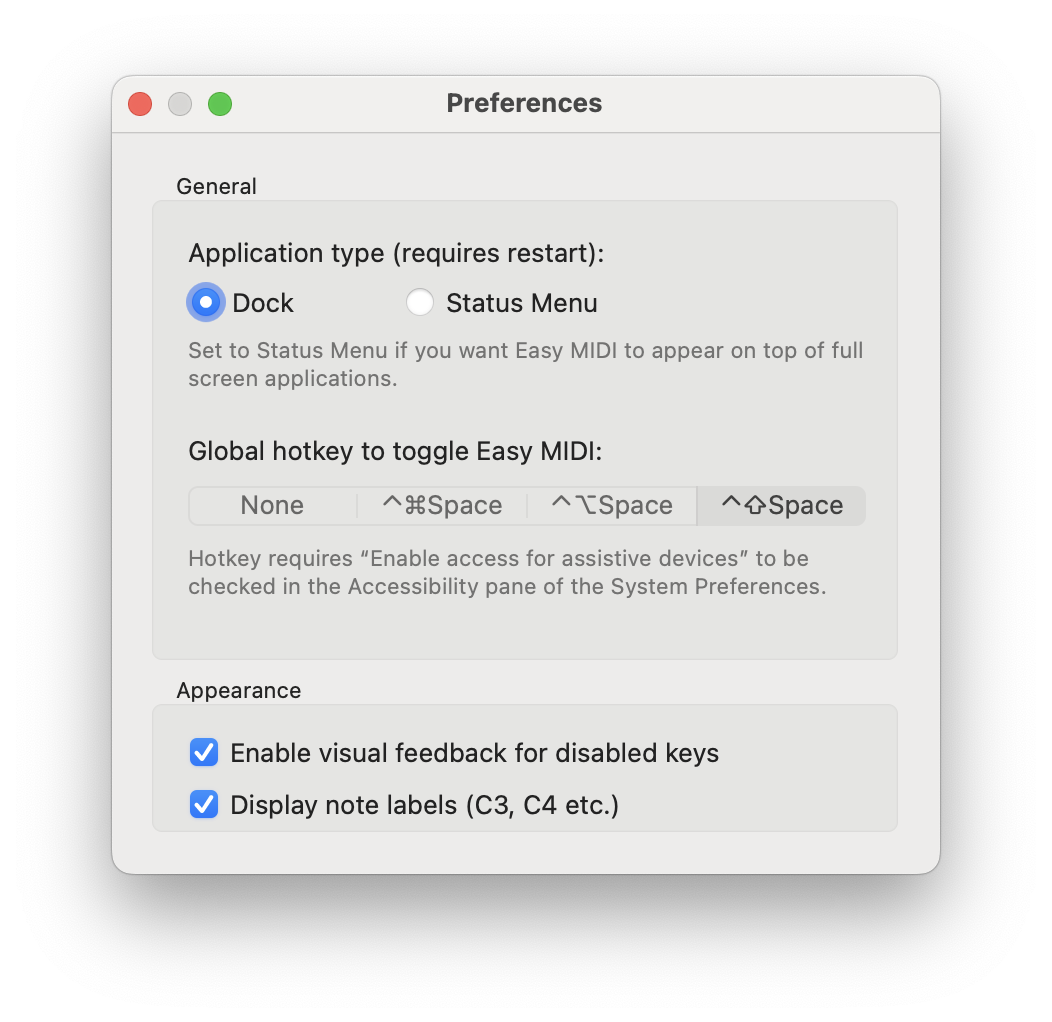
While you are working with your favourite DAW you want to be able to quickly bring Easy MIDI to foreground and hide it as needed. This is very easy to do with global keyboard shortcuts. By default you can use ⌃⌘Space to toggle Easy MIDI window. You can also use the OS X standard keyboard shortcut, ⌃⌘H to hide the main window. Check out the Preferences section for more details.
Preferences
Easy MIDI Preferences panel is very straightforward. Here you can set which keyboard shortcut toggles Easy MIDI’s main window and configure the app’s appearance.
By default, the Application type is set to Dock, but you may want to set it to Status Menu type as this setting will allow Easy MIDI’s main window to appear on top of full-screen apps. This can be very useful if you use Logic Pro in full-screen mode.
Configuring MIDI Inputs in DAWs
Here I’ve listed instructions on configuring some of the popular DAWs to work with Easy MIDI.
Logic Pro, Ableton Live & GarageBand
These 3 DAWs don’t need configuration as these apps monitor MIDI messages coming from all MIDI drivers on all channels.
Avid Pro Tools
- Launch Easy MIDI and Pro Tools.
- Select menu item Setup > MIDI > Input Device…
- A MIDI Input Enabled window will open. Make sure Easy MIDI is selected.
- Press OK to close the window.
PreSonus Studio One
- launch Easy MIDI and Studio One.
- Open Studio One’s Preferences and click on the External Devices tab.
- Press the Add… button, Add Device window will open.
- From the list (on the left side) select New Keyboard.
- You can change the device’s name to Easy MIDI by typing into the Device Name field.
- From the Receive From drop-down list pick Easy MIDI driver. You don’t need to set Send To.
- Press OK to close the Add Device window.
- Press OK again to close the Preferences window.
Propellerhead Reason
- Launch Easy MIDI and Reason.
- Open Reason’s Preferences window.
- Choose Control Surfaces tab and press Add button.
- Set the fields as follows:
- Manufacturer:
- Model: MIDI Control Keyboard
- Name: Easy MIDI
- MIDI Input: Easy MIDI
- Press OK and close the Preferences window.
Support
For further support please get in touch.